
Training Videos & Drills
1/16/24
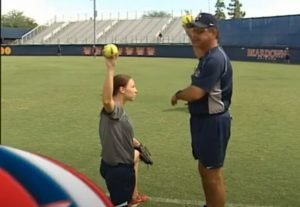
At our workout in Waldwick on 1/13/24, we worked on rundowns. Antonelli Baseball has a few good clips and tutorials, and I believe this one captures the essence of what we are trying to do. A lot of similar language and approach to what we do.
Coaches & Players, definitely invest the few minutes to watch and learn from this. Well worth your attention
12/18/23
We spend a huge hunk of time talking about proper throwing mechanics. The reason? It is the foundation or everything else we do. We cannot work a lot of IF, OF or advancing lessons if throwing mechanics are not well established. Probably one of the most under looked and under coached things in our game. Most errors result from bad throwing/ set up mechanics, not ability. If you’re ready to learn how to throw a softball correctly for more velocity and accuracy, this video explains EVERY step you need to know.
12/15/22
On 12/15/22 we held a P&C Skull session at the Viper Den, where we discussed pitch calling, reading hitters, setting up defenses and overall in-game philosophies. Thank you to all who came.

As usual, I prefer to post videos that are already done vs. re-creating a wheel. If I see that someone or some group teaches the way we do here, I post and share for all of our players to learn from.
I have come to really admire and respect Coach Justin’s videos. He is all baseball, but softball outfield and baseball outfield positioning and play are very similar with only subtle variances.
I will go through the video in some segments here and offer up some commentary.
Ready Position: very accurate when he states there are many ways to get into a ready position. I prefer to have glove foot a little in front and with the hands on your thighs/ hips, so you are ready to move. DO NOT put your hands on your knees. The foot movement, right left ready is 100% right! Must be in an athletic position!
First Step: 90% first step back is right. Your eyes are the horizon line. Anything over your syes is back, below your eyes means to get in. I do like the first step idea with the bat on the ground…good visual. Notice he talks about chopping your feet and AVOPID DRIFTING! Get to the spot, move your feet and when possible, come in on it.
Picking Up A Still Ball: Get your throwing foot on the side of the ball and PUSH DOWN. Coach talks about picking uip grass…cannot do that with a softball, but the idea is right. Angle your body so you are already pointing in the direction you plan to throw the ball…this will save you time and cut down 3-4 steps by the baserunner.
Hitting The Cut: First, re-read all of the above. Throw THROUGH the cutoff’s head, Not to them. Make a strong throw and keep it on e line. Let your cutoff be able to catch and throw the ball and quickly. These are major gamebreakers at the younger levels and extend innings that make comebacks more difficult.
6/6/22

We love posting videos here that enforce EXACTLY what we teach. I saw this video this morning and it is exactly the drill we do in our clinics and indoor work. The exact same way. Watch as Bill describes:
- the athletic position
- shoulder toward the target
- shuffle your feet (click your heels)
- snap your wrist
- follow your throw
- Follow through
This makes our defense better, pitching better and allows us to compete more. These simple things separate average teams from above average teams, above average teams to very good teams, and so on
Little things add up to big things
4/11/22
Been a while since we updated something here but a lot of our fundamentals are already present. Saw this from this weekend’s games and wanted to share:
Great piece of hitting, LF getting to the ball and getting rid of it quick. Catcher receiving in front and riding out, and the outside slide at home all tremendous. May have been out anyway but message to our baserunners: watch the extra steps and the the wide turn at 3b. Please cut the base as short as u can. May not have made a difference but would have been closer. 3b coaches: see the coach down the line so runner can see and hear you (not even with base). A lot here to learn from. Great stuff.
You can also see Coach Candrea’s video below with my commentary and “Viper Speak”
Thank you and Practice Scared!
12/15/21: Come Through The Ball & Stay Low
When I coach, run clinics and give privates with defense, I always emphasize to come through the ball. We need to stay low and follow our throw. This allows us to use our legs and get our body properly angled (lead with shoulder when possible) to get off a strong and accurate throw. I have used this exact training approach with wither my arm or maybe a hit stick (something soft and flexible) so the player can see and feel where they need to be. I saw this posted on The Gram and feel it is imperative to show here. Happy Training!
3/4/21: Be Short, Emphasis On SHORT
This is a great follow up to the Wall Drill we show below. Casting is good if you are on a fishing boat, but not in the Viper Den, game or practice. We use this drill as well to drive hand speed and hip turn. Gets the hands to the ball while promoting hip drive/ turn. Definitely make this part of your work/regimen. Want to move up in the lineup? You have to work for it and hit your way up…this will help you get there.
1/30/21: Field, Throw & Follow

We have not posted for a few weeks but here we are and back with a simple and NECESSARY item to focus on. Anyone who has worked with me in infield drills knows how obsessive I get with staying low and following your throw. I love the way Billy Ripken instructs and this is a great drill for our Vipers to work on whenever in the indoor facility…in fact should be part of EVERY defensive day you have.
The only adjustments I make and recommend is to: 1) does not have to be a 2b direction as shown in the video…work all if positions at different times; 2) work on a few different fielding types to get to the the throw…charging, hot shot, back hand, etc…. If done right, a team can get many reps and start creating muscle memory in 8-10 minutes. Can also work the 1st base stretch and coverage on the receiving end.
11/24/20: The Softball Catcher

We just finished 6 weeks of Catcher training sessions with our 10u,12u and 14u levels. To help support what they have been working on we want to post this video here.
Catching is so under-coached in general and we ae committed to changing that here. I remember being asked by a parent one time “why do you get so intense with (catcher name here) during the games? You seem to talk to her the most during games” I responded that there is only so much coaching I can do at team practices; that catching is something that takes years and years to understand. There is little to no way to replicate many of the situations they encounter and game reps is/ are the main way to teach and build upon what they get in practice or private lessons. Still not sure my response was embraced but is the 100% truth.
Thank you to Julz Koch, Cara Kochakian and Savannah Nowak for running these sessions. We really appreciate you paying it forward to our next generations.
We hope you enjoy watching these videos as much as we enjoy making them available to you
11/17: Warming Up & Throwing
I have attended practices, games and clinics for all levels this fall. One thing that our players can attest to, and I really am a pain in the butt about it…is the importance of how to make good throws. Proper throwing mechanics are critical to success and probably as important as anything else we do. If we cannot make good throws, we are in for a lot of long innings, poor seedings and some non-competitive play.
Good throwing mechanics begin with warm ups. Yes, it s that simple. Leading with your shoulder, following through, facing the ball behind you, etc…. It is all here.
Please take the time to watch this video. Most schools are remote now and our players certainly have the time. Coaches too…this is essential for you to install in your practices all winter. Essential!
I will not go into bullet points or commentary here. Just watch, learn and enjoy!
10/9: River Drill. ``Put The Ball In Play``

For those who have played and do play for us, we talk about doing your job and having productive at bats. It is IMPERATIVE to get the runner in with 2 strikes and <2 outs…whenever possible and as much as possible. We call it “The River Drill” and practice it all the time. This is a GREAT example of what we mean. Batter gets to two strikes with the bases loaded and 1 out. Box it up for strike one, not his pitch and takes it. The second swing he tries to do damage. That is great! With two strikes, watch the approach change and the sole focus is to get the run in. A lost art all around the MLB game and our game as many players are in for individual goals only. Shorten up & put the ball in play! A strike out does no good and only helps your opponent. As much as this game is about pitching and defense…you have to score runs to win and the rule book and tournament/ game rules do not ever tell you how many is enough. You have to score when you get the opportunity. The better the pitching, the less often these opportunities arise.
Sac Bunt, 10/7/20
I picked this video for its duration (short) and the way they have you hold the bat.
The sacrifice bunt is just that…A SACRIFICE. This is a part of the team game where you are giving yourself up (get me out instead of the runner) as an out to move a runner ahead to scoring position.
A few items of not as you watch this:
- Bat in fair territory
- Bat Control! Look at the hand placement. Bottom hand goes up towards the top of the tape and the top hand goes to the base of the fat part of the bat
- Start at the top of the strike zone, work down. Anything above your hands is a ball and you will pop it up
- Your Butt needs to go below the ball…you are like an elevator and you go down.
- Square your shoulders to the pitcher
- Nose behind your belly button…this allows you to work down and get your butt below
- Watch the ball be fair, then run. You are not bunting for a hit.
The videos they show of the bunter is more of a bunt for a hit…I do not like that part of this video, but the instruction is good. WATCH THE BALL, THEN RUN!
The Fake Bunt/ Ride Back 9/26/20

If you have seen/ watched/ read my baserunning drills & tips, you already know the importance of thinking two bases; about being greedy and getting every base you can. If you do not take the extra base, you put yourself into a position of having to potentially burn a strike to move a runner who maybe could have already been there. This puts your hitter at a disadvantage. For the sake of this writing/ video set, let’s assume we got every base we could and we now have a runner we are looking to move from 1st to 2nd.
The fake bunt/ ride back is one of the most powerful plays in softball, without a doubt. I think that Michelle Switzer does a really good job of explaining this.
- Get all the way back in the box. Back foot on the back of the line
- Get the bat in line with where the ball is. This will impede the catcher’s ability to read spin/ speed
- Be late in getting the bat back. Not too late that you obstruct, but late enough that it impedes ability to see
- Coach Switzer does not say this, but in addition to the above, we teach that when you ride back, keep the bat flat and watch it into the catcher’s glove, turning your number towards the pitcher.
This should give you every advantage possible to move a runner. If you stay up in the box, just raise your bat and do not impede the catcher’s view/ throwing lane, you will make it very easy for the coach to make lineup changes.
Coaches…please practice this when you do your bunting. It is not instinctive.
Baserunning Tip: 9/22/20
I mentioned in the 14/16U clinic yesterday how at the levels they are playing at, especially showcase levels, little things are often the difference in wins and losses, playing competitive or not. Here is an example for baserunning. YOU DO NOT NEED TO BE FAST TO BE A GREAT BASERUNNER! You need to be smart and know the angles to take. Antonelli Baseball does a great job of highlighting the need to properly cut the base and get your angle towards 2nd base, Spend the 5 minutes watching this. It is well done. They also talk about the need/ no need to ALWAYS pick up the coach when the play is in front of you.
An FAQ is “which foot should I always touch the base with?”. Answer: Whatever foot keeps you ion the best stride and pace to make the turn. It really does not matter. I have heard arguments on many theories…it really does not matter unless you are not allowing yourself to take the best angle.
This same approach applies to 2nd and 3rd. No need to run towards left center or the third base dugout to go to 3rd or home…NEVER! Same approach.
Hope this helps you and leads to more extra base hits & runs scored. It should!
Drills/ Tips: 9/17/20
Throwing Harder & More Accurately
As we enter our new 2020/21 season I think it is important to start sharing good drills/ fundamentals & practices again. I will attempt to do this weekly but if not, they will be very regular.
I follow Coach Justin and his videos. I think he has some good stuff at times. While the title of this is Baseball, do not be fooled. This translates to softball 100%.
For our older players, this does not go into details and specialized angles or throwing in certain situations, but it is worth watching and taking reminders.
3 Tips:
- Mechanics: he discusses here about not opening the front side. If anyone has ever been at my practices, I am a pain in the you know what on leading with your shoulder and stepping towards your target. He also references the “L” and long arm from the outfield. These are basics that I ask our coaches to be mindful of at all times. You will play as you practice. Do not subject yourself to making bad throws under pressure in a game because of something you can easily manage and control in warm ups and practices to create the proper muscle memory
- Use Your Legs and Core: Arm strength comes from using your body, not your arm & shoulder. Push off the back leg (remembering #1 above).
- Increase Stride Length & Speed: Couples #’s 1 & 2 above. This is also incorporated when you extend to long tossing, with the crow hops and stride length. At the 4:30 mark, watch the separation of hands to get into the throwing position. Very good.
Teaching Opportunity / Drill For The Week 7/20/2020
If you watch our drills and read the commentary along with them, a common theme used with our defense is to beat the ball to the spot! This is true for both infield and outfield positions. You can read the rules of our game, baseball or softball, and the rules will never tell you what hit, what play or what situation can lead to being a game changer. Control the controllable…maximize your effort for 4-6 seconds and you can save the game, perhaps even win the game without realizing it.
Here is an example. This video is a great, and I mean GREAT play by CF Olivia Jarvis. A one out hit in a tie game in the to of the last inning. Olivia busts out of the chute from CF, beats the ball to the spot, does a reverse pivot and gets the ball into 2b…all to keep the runner at first. To the casual observer, if the ball rolled through the outfielders and the batter got a one out double, it might not really concern them as much, a hit is a hit and there is still one out. As a Viper Director Owner, this here is an example of the things we want our coaches focusing on.
- The next batter singled, making the situation 1st and 2nd instead of 1st and 3rd, or even runner on 1st and a run in.
- The next batter hit a fly ball that would have been a sac fly had there been a runner on 3rd, instead it remained 1st and 2nd.
- The next batter grounded out to end the inning
- We won in a walk off fashion in the bottom of that inning.
By holding that hitter to a single instead of a double, in what would have been a run and a lead, ended with 1st and 2nd and no runs and allowed us to hit and win the game. YOU NEVER KNOW what play or hit is a potential game changer, that is why you need to play them all hard. Our Premier team works this drill all the time both indoors and outdoors…it does not just happen. That’s why I chuckle when I am told outfield drills cannot be done indoors in the winter. Yes they can and I always offer to show them. I have taught this in organizational clinics and at different level practices when I have attended. When parents ask me why their kids are in the outfield and not the infield…my response always is that outfield is as important and even more important at times. This video is evidence of why I believe that…we do not just hope to make plays like this…we NEED to make plays like this.
Drill/ Teaching Moment For The Week: 7/12/20
A bit of a departure this week from previous video shares. Here is a 5-4-6 double play. A lot going on here. This is the result of years of practice, drills and understanding the way the game flows. It does not just happen.
An example of why our winter workouts are so important and how they lead to execution in the summer. We work this ALL winter. Here is our 18u Premier team in Newtown showcase. Runner on 2nd. Pitcher (Raegen Germano) hits her spot on inside corner (Julz Koch) to keep runner pinned at 2b. Watch the movement forward and look back by 3b (Mckenna Lont ). 1b (Brandi Shortway) takes the throw knowing she may have to return fire to 3b. SS (Savannah Ring) backfills, sets up footwork and swipe tags for the DP. These are the things that separate and differentiate teams at all levels. Ways to shorten innings and why the attention to details and focus during our drills and clinics are so important. Who says this game is boring? When we say “Practice Scared”, we mean to be scared someone else is working on plays like this and not you. Hence why we need to outwork everyone.
2) River Drill
This game is about scoring as many runs as you can while giving up as few as possible. Moving runners and scoring on outs are critical to success, especially at higher levels and vs. top pitching. We drill this all the time…clinics, practices, etc. River Drill. Put the ball in play! Runner on 3b, <2 outs you HAVE to put the ball in play and score on an out. The pitcher gives you the outside pitch to do it 95% of the time. Great job by Cat Serek getting this run across. Again, this does not just happen and results from hard work and practicing it. We get some eye rolls when we roll this drill in practices…this is why it is imperative to be comfortable with it! #getyournameinthepaper. #dqtv. #weareeverywhere
Drills For The Week: 7/6/20
I mentioned in a previous post that pitchers will be ahead of the hitters for a bit. It should start to balance out during your second week of game play.
Here are 2 Drills/ Reminders I want to share:
This is something I do all the time with hitters I work with in the facility. You can do this anywhere. Carry an old bat with you…one that you do not care if it gets dented, scraped, etc….
Harrold Reynolds does a great job here explaining it. I do not recommend to keep walking up as he does here…start with the bat against your belly button and the wall/ fence. You can do this at the field before a game against a fence (just use an old bat). That is enough space…29-33” away based on bat size. Allows our swings to be short. Don’t cheat…hit the fence, so what? Make the adjustment and get shorter!
Stride/ Tee Work (Placement is key!)

In our winter and open hitting training, everything works off the pitch down the middle, “the cookie”. If we cannot hit that one, we cannot hit the other ones. We want to maximize weight shift, hands and rotation by hitting the ball as it crosses the plate right about our front foot. This will position you to turn on the inside pitch and let the outside pitch travel, because they all work off the same starting point. Michele Smith does a great job explaining this. This fundamental works for both baseball and softball, in case the boys are wondering.
Watch, listen, deploy and enjoy!
Week of 6/29/20
I warned in our ramp up to Return to Play that we are entering a time of year where we are used to being very competitive and having certain expectations with that competitive spirit. Let me be clear on this…I want EVERYONE to be competitive at all times. By that I mean work your butt off, try your best and do the little things…especially the ones that take no talent (being on time, hustling, etc…).
What we all need to understand is that to go from individual home workouts and a few (if that) ramp up team workouts to almost immediate game action creates a lot of challenges. Some are:
- facing pitchers throwing harder than you have seen in a long time
- pitchers with multiple pitches and movement
- Pitching Will be ahead of the hitting for a while
- Outfield judgment on fly balls/ depth.
- Infielders with their approach to the ball and cadence to field and throw with a runner running. Body clock takes time to reset
- Catchers fielding bunts/ throwing to bases with batters in the box from a moving pitch
- Pitchers reacting to batted balls
- Baserunning instincts…hard even at fluid times
Coaches/Players/Parents…remember that all of the above is natural and expected, it does not come back when you take the bag off the shelf and head to the field again. It is something that will return to each player in its natural course and at different intervals. Should not take long but it is not a light switch. MLB players going back today need 3+ weeks of a new Spring Training to prepare for such things, then longer than that when they start actual games…and they are the best in the world.
Don’t Be Afraid Of Fast Pitching

I want to focus on hitting today. Not mechanical, but more mental and preparation. While this is a Baseball related video, the purpose of my sharing is that the mental approach to hitting is the same in either baseball or softball. I think Coach Justin from Ultimate Baseball does a really good job of walking/ talking through how to approach fast pitching…especially early in the season. I use many of these same examples when I coach
Checkpoint 1:
- As he mentions, the MPH for a pitch is relative to each level. The baseball analogy is right. For softball, 54 MPH at 10U from 35 feet is heat while 54 MPH from 43 feet is on the slow end of the spectrum
- Everything works off the fastball. ALWAYS look fastball and adjust to the off speed pitches. ALWAYS!
- He talks about stepping up to the plate and not being ready for the fastball. Honestly, there is little to no excuse for that to ever happen. I concede to little because there may be a situation where it might happen…but 99.999999999999% of the time there is no excuse.
- Leadoff hitters get to see 5-8 warm ups before they step in the box. EVERY pitch should be looked at with determination. Pitchers will throw all fastballs in their warmups 99% of the time
- After that, EVERY hitter gets to see how hard the pitcher throws, from warm ups to game action. They also get to see where the catcher is setting up, what the umpire is calling, etc….
- Hitters after their at bat should be going back and telling their teammates movement, speed, etc…
- This is not in the video, but players and coaches should be talking constantly on umpire zone, low, up, in, out? This helps you with 2 strikes. If the pitcher is smart they are adjusting to it as well
- Those who have played for me know how I go on and on about this: you should be taking at bats in the dugout, in the hole and in the on deck circle. Let me repeat that… you should be taking at bats in the dugout, in the hole and in the on deck circle. I have preached this for years. I love that Coach Justin talks to it. There is no excuse to be unprepared for an at bat if you are paying attention and WANT to hit. It is business time, not social time. Why go up for an at bat and not be as prepared as you possibly can be? Not only do you owe that to yourself, but to your teammates.
- Start sooner and stay true to your swing (short not long, emphasis on short). If you speed up it’s a domino effect and multiple mechanical things can layer up on you. Trust your swing and your hands
- Off-speed pitches go to the opposite field. Look hard, adjust slow and by keeping your weight back, take the off speed stuff the other way
Checkpoint 2:
- Fastball pitchers like to throw fastballs. For the majority of pitchers you will face, 90-95% this is the case. At the younger levels, it is more like 98-99%. See the game in front of you & play the percentages
- If you are preparing for the fastball like I listed above…you need to be ready! Start sooner, know the wind up and the release point
- If you are batting 2nd through last in the lineup, you will get to see the quality of the secondary pitches, when they are thrown and if they tip the pitch (slow down the motion for a change, hold the ball/glove a different way for a curve, etc…). This is a mental and strategic battle as much as physical. Outsmart your competition. They are trying to outsmart you
- If our hitters are late and striking out…the more fastballs you will see. Why not? I would until they prove they can hit it. Why speed up the bat with a curve or a change? No thank you.
- Coach talks about “maybe they will throw 3 change ups in a row” then dismisses it. Classic and spot on! I have seen back to back change ups thrown maybe 3 times in my life. Back to back to back? Never. Doesn’t happen. Should always look for the express train (fastball) after the change up. Start that much sooner. Look hard, adjust soft
Checkpoint 3:
- Go sooner, not faster. Notice a trend here?
- As a coach, I will often cite “load sooner” or “load earlier” against fast pitching. That is demonstrated here
- Softball: instead of “leg up” like baseball, it’s the start of motion, bob or separation
Commit to Swinging
- As a hitter, I rarely went up looking to take a pitch. 99% of the time, I went up looking to hit (unless the pitcher walked 3 in a row, leading off down 2 or more and needing base runners, things like that).
- I was ready to go, then adjusted to the pitch I saw. If it was in the wheelhouse I did damage. Even if I was fooled a bit or did not get the sweet spot on it…I was in a position to hit mentally and physically and got a lot of hits off of pitchers pitches because I was ready. He discusses that here. That is where we have built up to here. This is 1000% accurate
- Hit-Hit-Hit-Yes-Yes-Yes, Let it go/No…ball
Eliminate Pitches
- I mention above fastball pitchers like to throw fastballs
- Coaches/catchers all have tendencies (except me, haha). It is YOUR job, and your coaches job, to pick up on them and make in game adjustments.
- If a pitcher cannot throw the curve, rise or change up for a strike…let them go. You should be able to see this in the dugout as you prepare for your at bat as many as 8-9 hitters before you even get up. Bench coaches and base coaches are hopefully picking this up as well and letting their players know. This is a game of wit as much as anything.
- Play the percentages.
This is not in the videos…if you are not paying attention to every at bat of your teammates ahead of you, standing in the dugout and taking mock strides or “air swings” (without a bat), you should ask yourself if what you are doing is more important? I cannot think of anything but I am a bit obsessive.
So, as pitching is ahead of hitting now…this can help you work out of that. I have been told by parents and coaches “I need to take FILL IN TEAM/NAME HERE to the batting cages and hit the really fast pitching”. In theory it’s a good idea but remember as shown here…trying to hit off of a fast batting machine may not necessarily be the answer as in most cases it eliminates the load and timing/ dance with the pitcher. I am not against it per se’, just make sure you are working on starting sooner and simulate what would be the pitcher’s windup.
This will help you as you acclimate back to the batters box. Many hits hopefully await you as you look two out of the box!
Rundowns...6/18/20

I was asked if I could provide some help on rundowns. I will also include this in our Training section. The video here is for visual purposes…below are my takes on how to teach and execute.
One of two things should occur in a rundown:
- Result in an out (95% of the time). This is great! Best outcome
- Keeping the runner at the base they came from. This is okay. Next best outcome as nothing changed from where you were…only lost opportunity is that you could have shortened an inning
There are many theories on how many throws it takes to complete a successful rundown. In my opinion, the max number is 3. It may take a throw to set up the run down, and including that, no more than three.
So, what are some of the basics you need to know to execute this successfully?
- Whenever possible, get the ball to the fielder at the advancing base ASAP. You do not want the runner going towards the next base if you can avoid it
- Create a lane…do not try and throw over a runner
- Show the ball. Hold it up in your “L” type position. Do not fake throws…just show the ball
- Run the base runner back where they came from as much as possible
- Make the runner commit & show their number. Do not permit them to dance back and forth
- Throw the ball in a “dart type fashion”…we are not trying to set speed records
- All players must be on their toes, ready to receive the ball and ready to sprint into action. Be in your athletic position. If a fielder is going to try and start from a stand still, unathletic position…you are asking for trouble.
- Throw the ball to your partner and go to your right…you will then go to the back of the line of the other base in case more throws are necessary.
- Close the gap…trap the runner as much as possible by the fielder from the advancing base coming towards the base the runner is coming from
- Either player can make the tag…the preference is whoever can make it if it results in an out
- Please remember…if you are going to CHASE a runner to make the tag, chase them back, only ahead for a few steps to close the gap
- Tag with Two hands…do not do all this work for a runner to knock the ball out of your glove
Note…if you are a cut off person or infielder and have the choice of running at the runner to make them commit, take an angle towards the advancing base so they have to run back to the base they came from
Probably one of the most under coached situations in our game…not that it is less important, but in organizations like ours there is only so much time to cover a massive amount of material. I encourage EVERY coach to review this with their teams as practices resume.
Drills For The Week, 6/8/20: Hitting The Outside Pitch
Hey all you Vipers out there!
I am going to keep things simple this week and have you focus on one thing and one thing only…hitting the outside pitch to the opposite field. Most pitchers will make this their primary location. That is where their coaches and catchers call for pitches most of the time. Further, this is where most pitching coaches train their pitchers to throw.
When I watch our kids take batting practice, whether it be tee work, soft toss or front toss, we should be working pitches in various locations. Countless times I see kids have a tee on the outside corner and say they are working on pulling the ball. I also see them say they are working on outside pitches with the tee out in front of the plate.
Here are two videos that I believe showcase very well how to go about hitting the outside pitch.

Sue Enquist: is a former softball player and coach. She played softball at UCLA under Sharron Backus from 1975 to 1978. She helped lead UCLA to its first national softball championship in the 1978 Women’s College World Series and became UCLA’s first All-American softball player.
While I think the tee drill shown here is a bit advanced, ultimately I feel can likely alter the finish/ follow through (as I believe the player kind of does here). Having said that, I think this is a good visual and demo. There are a few things she cites that are imperative:
1.She says that the batter is in the same position in the box and strides the same to hit the ball as anywhere else. The reason? You do not know what pitch is coming when you are hitting
2.Look how the ball is placed and how deep it is. The outside pitch must travel in the zone.
- Head stays down/ on the ball
- Point of contact is between the belly button and back hip
- Hands stay inside the ball
- The turn ends around the direction of the second baseman. You do not have a full body rotation when hitting the ball to the opposite field.
Again, I do not encourage the second tee position. Just ensure the ball is on the outside corner, just off the plate or on the outer half. The ball must travel!

Jessica Mendoza: helped the United States softball team win a gold medal at the 2004 Athens Olympics, starting every game in left field
This is a video by one of the great softball hitters of all time, Jessica Mendoza. Again, she also cites do not change a lot with your swing. The reason is you do not know what pitch is coming. As you pick up spin/ location, you need to be ready to take the ball to the opposite field.
Make contact deep in the zone.
-
- I believe the best way to mark it is at or between the belly button and the back hip.
- Keep your hands inside the ball. We do this so the sweet spot gets to the point of contact.
- Your weight stays back…this way you can drive the ball with power off your back leg.
- Head down
- Jessica is very direct that you do not take a full turn. Lefties should end up towards the shortstop…righties towards the second baseman.
-
- Watch how she falls towards where she is hitting the ball! Those who have worked with me, I say “its almost like you are walking after the ball AFTER contact.” Jessica actually shows that when she demonstrates it.
In addition to driving the ball to the right side…this also doubles as your two strike approach. If you need to make contact, majority of these tips apply. Another story for another day…but this is a good jumping off point for that. Strikeouts do not ever help you…make contact!
Have fun and stay safe!
Coach Bobby
Drills For The Week, 6/1/20: Baserunning

While we have a light at the end of the tunnel for this “shutdown”, it is time for our players to start getting back in shape. I have said previously that the two most under-coached positions are first base and catcher. Well…the next thing that is under coached and rarely coached is baserunning.
Let me start off by saying, you do not have to be fast to be a great baserunner. Let me say that again, “YOU DO NOT HAVE TO BE FAST TO BE A GREAT BASERUNNER!”. All you need to know is how to get good jumps & how to round bases. Ultimately you need to read your coaches and that they are coaching their bases the proper way. I’ll deal with the coaches in an upcoming on field clinic I will be doing.
As usual, while most of the fundamentals with baseball and softball overlap, baserunning in our game is much more aggressive, making turns, cuts and jumps that much more important. Our bases remain at 60 feet and our fences are usually 200-225 feet. It is a much smaller field, hence making these fundamental basics that much more important.
Baserunning is not intuitive or a natural thing…it is a taught and learned skill! The amount of games & tournaments our teams have won because of baserunning are overwhelming.
Almost every outdoor or full field practice I do ends with baserunning drills.
I have shared my affinity and admiration for two coaches repeatedly in these forums…Billy Ripken and Coach Mike Candrea. Here is Coach Candrea and how he approaches/ teaches baserunning.
A Bob Germano saying on baserunning is…”Always think two bases! Make the coach stop you”.
Running through 1st Base: This is when you are trying to leg out a ground ball in the infield.
• Bust it out of the box…force the defense to make a quick and accurate throw
• Hit the front part of the base (shortest distance)
• We teach to slow down and stop AFTER running through the base to anticipate an overthrow.
o Coach says he wants his players to look to the right for an overthrow. Same principle.
o Coach references 65’. That is exactly what we teach!
o The idea is to be ready to take 2b if available as quickly as possible
Rounding 1st. This will come when we hit a ball to the OF
• Your 1B coach will help you when possible
• Touch the inside part of the bag…lower your shoulder to drive into your turn
• No need to round the base wide…cut the base so you can get as close to a right angle turn to 2b
o Left Foot or Right Foot is not very important…cutting the base is the most important
o Remember, the shortest distance is a straight line. No need to run towards right center field to go to 2B
• You should have the ball in your own sightline and have the ability to read if there is a bobble, a bad hop.
• Stay low and athletic…sprint with the intent you can go to overdrive
• DO NOT BE HAPPY WITH A SINGLE…ALWAYS THINK 2 BASES!
• The Right field look is a bit advanced for most of our kids. Good thing to know
Leads at 1b: Coach talks about a “Rocker” lead (my preference) or a Leading Off The Front. I like the rocker lead because you can get more momentum and get more of a running start while your foot is on the base in sync with the pitcher’s release
– Coach talks about getting back, go to the back/ outfield side. That is where we dive back to. Make it harder to get tagged out while making the ball travel further.
– How far do you get off the base? As far as you can of course. The 1B will tell you at least how far you can go…however far off and in the first baseman is…that is at least as far as you lead! COACHES, THIS IS YOUR JOB EVERY PITCH TO REMIND YOUR PLAYERS!
Two Types:
1) Steal or Hit & Run: you are going to 2B
2) Two Way Lead: You must be prepared to go to 2B or back to 1st
Leading Off 2b:
Can be more aggressive. The catcher has the furthest distance to throw here.
• Know where the infielders are. Centerfielder too. Remember, our fences are only 200-225” away. A shallow playing CF can sneak in very easily.
• Your 1st or 3rd base coaches should be helping you with the fielders behind you
• If not forced…watch the ground ball in front of you! Do not run into an out! 3rd Base coaches…if that happens, it is 99% your fault because you need to remind them almost every other to every third pitch!
• Take your first two steps, then get into a secondary lead! Be prepared to go ahead, go back, or take off to score.
• Are you trying to go from 2nd to 3rd? 2nd to home? Be prepared for both, but remember, ALWAYS THINK TWO BASES. If the ball is not hit on the ground in front of you…the 3rd base coach should almost have to tackle you to get you to stop….that is how you have to think when rounding 3rd (obviously with the ability to stop)
• When taking the turn at 3rd, coach talks about taking a little bit of a wide turn. I do not believe it needs to be as deep as shown here…it can be closer to 3rd base and remember to cut the base so you are going in as straight a line as possible towards home.
o There is no reason, ever, to run towards the 3rd base dugout to get to home plate.
• Tagging…look at the play and judge it yourself. Coaches, again, you need to be reminding this all of the time
Leading Off 3rd:
• This is the closest you will get to home plate with out scoring.
• Need to be aggressive but smart…have to be able to score on:
o Base hits
o Errors
o Ground balls
o Medium depth fly balls
o Deep fly balls
o Foul balls where momentum taking infielders or outfielders away from home plate.
o Wild Pitches
o Passed Balls
• Lead in foul territory. Why? If the ball hits you, it’s a foul ball. If you are on the line or in fair territory and it hits you, you are out!
• Come back in foul territory…so that it is a wider tag but also so that you can dive back with your body as far into foul territory as possible with your hand reaching back
• Control your lead so that you are in a position to be aggressive and score quickly. If you are not in a sprint ready mindset/ position…you can cost your team a run, a ballgame or a tournament championship. The higher you play the less often you score. We have to score as much as possible when a runner is on 3rd.
• Stay low…square your shoulders to the infield
• With less than two outs…when the ball is hit in the air to the outfield, you should be ready to tag.
o If it drops you can almost walk home
o If it is caught, you can tag.
o Again…coaches own this as much as anyone.
I admit it is not easy to run bases at home. You can:
• Shorten the distance. Try running through 1b or rounding it starting 20’ away
• If you do not have a base, use an old shirt, box, old hat…anything to simulate it.
Have fun and stay safe!
Coach Bobby
Drills For The Week: 5/25/20
I apologize for being a few days late this week. The extended holiday weekend though a wrinkle into sending. Believe it or not I had these ready to go last week.
To reiterate what I have shared previously, I prefer to share videos that I believe are well done and get the points across that we are trying to highlight. There may be subtle variations to either softball or the Viper ways, but the foundations are right. Why re-create the wheel?
Picking It at 1B:
I want to repeat here that the two most under coached positions in our game are catcher and 1st base. When you think about it, other than the pitcher, they touch the ball the most. This is another Billy Ripken video, who I think does an AMAZING job.
- Attack the ball, do not let it sweep into you
- Do not stretch to soon…be in an athletic position so that you can see what direction, height and speed the throw is coming
- Your glove foot will step towards the throw, landing as you catch
- Keep your head down…you have to see it to catch it
- Use of one hand is essential…cannot stretch far enough and scoop with two hands very effectively
Flip
This is a very important part of our game. Flipping is a skill that needs to be practiced over and over and over. The short bases and speed of the game makes this more important in softball than baseball.
- Field the ball out in front
- Stay low…we do not stand up to flip
- Chase after your flip…we do not flip while standing still
- We have always taught to have your fingers chase after your flip. BR teaches to finish high. I am indifferent to this…either way works. The main thing here is to stay low and follow your flip.
- Flip to where your target needs to catch the ball
- Yell FLIP as you do this so the receiver knows what/how is coming
Ground Ball, Follow Your Throw When Throwing to 1B
More Ripken. Again, why re-create the wheel? BR does such a great job…I think he must attend my practices and hear what I say! You will see a pattern to what we teach in our indoor training. Things I have always emphasized: lead with your shoulder and follow your throw. I would use the poles in the facility as an example…field at the further pole and end up at the next pole. This keeps us in an athletic position, eliminates the stand up and throw and keeps you accurate. While I have never deployed this set up as shown here…I will when we restart.
- Field the ball out in front. Head down. I like the glove foot out in front and fielding at the instep.
- Shuffle/ Click your heels
- Momentum keeps you going
- We just don’t catch the ball and stand straight up!
Bunting (Sacrifice):
To mix in some offense here, the sac bunt is critical and essential in our game. When in a tight game, this is how you move runners. This is also how you beat great pitchers…make the game speed up! Jessica Mendoza is awesome and someone I totally respect. Her training video here is spot on and
- I prefer the second stance she demonstrates…in the first one I believe opening yourself up exposes your entire body unnecessarily and creates a lot of extra movement.
- She explains why bat control is so important…notice the bottom hand move up to the top of the tape. Top hand goes to the barrel. This allows you to protect the top hand and maximize bat control.
- Square your shoulders.
- We teach to have the bat at a 45 degree angle. Some coaches teach parallel to the ground. I believe the 45 degree angle allows for the most success
- Start the bat at the letters (VIPERS). That is the top of the strike zone. Anything above your hands is not a strike
- We work down in bunting…start at the top of the zone and go down
- Your lower body is how you go down, not the bat. The term we use is “butt below the ball”. This allows you to, in an elevator type fashion, move downward to get the lower pitches while keeping the bat in proper position.
- In order to use your lower body, your nose/ head cannot be leaning forward. Nose even with or behind your belly button.
- Head stays on the ball
- These are not bunt for a hit mechanics…these are sac bunt mechanics. Emphasis on Sacrifice. Do not run to 1B until you see the ball on the ground. You are being sacrificed, meaning the coach is willing to give up an out (you) to advance another runner into scoring position. SEE THE BALL ON THE GROUND THEN RUN TO 1B.
Thank you for taking the time to review and watch. Hopefully you are working these drills into your own practice time.
5/18/20
Welcome to our Drills For The Week video series. We have something for middle infielders, 1st basemen and catchers this week.
As I have shared in previous editions…rather than film ourselves showing our drills, I have chosen to rely on (in most cases) professionally done videos that coincide with The Viper way of doing things and are consistent with how we have taught and continue to teach these important skills & drills.
Double Play Pivot
The first item we are covering this week is the Double Play Pivot at 2nd base. I shared a few weeks ago my admiration for Billy Ripken and how he teaches and breaks down drills. These videos show how to set up and take the throw from both the 2nd base and shortstop side of the bag. These middle infield videos are short and easy to understand
2nd Base Side:
- Get to the base quickly!
- You can cheat if need be, however be careful you are not giving up too much.
- For younger levels, you need to protect against the late swing/ ground ball to the right side.
- Mid/older levels, if you are in a bunt defense where your 2b has to cover 1b, you need to be aware of that too.
- Hence, why we are always athletic, ready to move and cannot drift
- Left foot on base
- Right foot to the ball
- BR does not mention here, but if the SS is there early, do not stand still! Chop your feet to keep momentum going so you can come towards the ball
- For a perfect throw/feed, pick up the right foot and put it down to make the throw.
- This is another reason why we need to bend our knees, be athletic and get your legs/body into the throw
- Make sure your shoulder is turned towards your target
- Use the base to protect yourself…avoid staying on the base or stepping into the sliding runner
There is a rule when turning a double play…you cannot get two if you do not get one first! Make sure you get the first out first!
Shortstop Side:
- Get to the base quickly!
- You can cheat if need be, however be careful you are not giving up too much.
- Hence, why we are always athletic, ready to move and cannot drift
- Right foot on base
- Left foot to the ball (attack it aggressively)
- Turn your feet and your shoulder towards your target (sound familiar?)
- BR does not mention here, but if the SS is there early, do not stand still! Chop your feet to keep momentum going so you can come towards the ball
- Drag your foot on the base
- Clear the bag and get off your throw!
There is a rule when turning a double play…you cannot get two if you do not get one first! Make sure of one so that you can go and get two!
Receiving Throws at First Base:
In my opinion, one of the two most under coached yet most heavily relied on positions on the softball field is the 1st baseman
- Throwing foot on the base (Right foot for RH throwers, left foot for LH throwers)
- BR wants the heel on the base…I teach the ball of your foot so can stay on so that you can raise up if need be…also makes you more athletic if you need to pivot. You can see what I mean in the demo too. Having said that…go with what is most comfortable but more so with what works for you.
- If you choose the heel and come off the base in a game I am coaching…probably do not want to sit next to me in the dugout for a few weeks. HAHA
- Set up in an athletic position.
- Your glove foot will go in the position the throw is coming from. It is like an arrow to the ball
- Catch the ball as your foot hits the ground. That will teach you “not to stretch too soon”
- Keep the glove inside your body if possible
- Good example of the crossover and open pivots. Similar to triple threat in basketball and why you need to be in an athletic position
- Nice visual with the two cones for the 1B to catch between
- The 1B makes the infielders look good
- One thing BR does not go into that we emphasize and cannot overstate in importance…when you catch the ball…whenever possible…eyes above your glove and butt below the ball. This allows you to stretch and get those close plays to go your way
- Catch with one hand (when possible) to maximize your reach. You can stretch further with one hand than with two
Catcher Blocking:
The other most under coached position is the catcher position. I will go into three different areas here (and can probably go into three hundred). We will cover blocking, framing and throws down to 2b.
Wild pitches or passed balls ultimately are bookkeeping entries. In the scheme of the game they are irrelevant how you score them because they both allow runners to advance. Our pitchers work on hitting spots with their pitching coaches. Our catchers should work on blocking. Coaches…do you warm up your catchers before a game by giving them blocking drills? If no, why not? Don’t we expect them to do that during a game?
- Drop and have the knees down
- Glove in the middle with throwing hand behind the glove
- Shoulders leaning down towards the ground. This allows the ball to stay in front of you should it bounce up.
- Allows you to smother it
- Keep your head down and mask straight…that is where your protection is.
- If the ball is on the inside or outside parts of the plate, angle your body to have the ball roll towards home plate and not to your siders or behind you.
- Home plate never moves…you always know where the ball is
- Runners hesitate when they see the ball in front. That slight hesitation may keep a runner pinned or allow you to throw them out trying to advance
Framing:
Again, an opportunity for a catcher to make their pitcher look good. This is an important skill and talent, but one that needs to be taught and practiced. We do not have professional umpires in our game, nor are they evaluated on computerized strike zone accuracy. Something our catchers can do regardless of time of year, inside or outside.
- Imagine a square strike zone…you want to have the pitch touch (or appear to touch) the limits of that zone.
- Zone runs from letters to knees…one side of the plate to the other
- Remember…the ball just needs to touch the outer zone, so you essentially get a ball width on each side of the square
- Be relaxed and quiet…try to avoid snatching. RELAX!
- Inside pitch…catch the outside of he ball and curl your fingers
- Outside Pitch…catch the outside of the ball and curl your fingers to turn it in
- High Pitch…get on top of it and face it down towards the strike zone. Be strong and do not let the ball carry your wrists/arm out of the zone
- Low Pitch…keep the glove facing out. Drop your knee to have the ball stay or appear more in the zone. This is the toughest pith for an umpire to call because it is the toughest to see. The catcher can steal this pitch more than any other
- On a low pitch, if a catcher faces the glove up like fielding a ground ball, it signals to the umpire it was too low to catch in the zone. This will likely result in being called a ball in almost every case
- Strong wrist and forearm is essential to framing the low pitch.
Throwing to Second Base:
Throwing down to second base is one of the more challenging things a catcher does. Again, I ask the coaches a question…how often do you practice this with your catchers? Do you warm them up by simulating throw downs before a game/ tournament? When we see coaches in other programs use their catchers to catch the throw ins for ground balls and toss to the coach hitting fungos…ask yourself, “is this the best use of our resources to warm up our catchers and get them game ready?”
- Be quick on the release no matter what. Get rid of the ball
- Catch then bring the glove & ball back to your ear as you turn and rise
- Pivot and turn your shoulder…elbow towards your target
- Stay balanced and athletic…do not stand straight up
- As you throw, your throwing arm should end up on your glove side to ensure you follow through
A little bit for everyone here. I hope this gives you some perspective on playing these positions and how you can work on your game while sheltering in place at home.
As always, I am a phone call/text/email away should you have any questions, comments or want any additional help.
BG
Drills for the week: 5/11/20
Outfield
My fondness and respect for Coach Candrea is no secret. I do not know if there is a better teacher in our game. His successes at the University of Arizona and with USA Softball are not by accident.
As a former outfielder, I think there are many great things in here. Coach Candrea takes you right into the outfield with him and breaks things down in a very easy to understand fashion. We here at the Vipers teach a lot of this regularly. While some may seem a bit advanced for our 10U girls, I have introduced all of this over the years at all levels I have coached. I encourage our coaches to do the same.
I am asked all of the time, especially at the younger levels (but not always) about infield playing time. I will say here what I say when asked…EVERY position on a softball field is important; often times and specifically the outfield. Playing the outfield is not easy. Catching fly balls, running down balls in the gap, getting the ball to the cutoff…it takes skill and practice. Sadly, this position can be overlooked by many and under-coached. There are no position players behind an outfielder, so understanding the what’s, why’s, when’s and how’s are very important.
Outfield Ready Position
Different from the infield “right-left-ready” position. You are further from home plate and have much more distance to cover than an infielder.
- Must be ready to sprint. Stay more upright but in an athletic position with knees bent and weight on the balls of your feet.
- Face forward toward the pitcher
- Glove foot slightly in front of throwing foot (allows to drop step/rip open). Some coaches teach feet even. Ultimately it comes down to choice, however I am very biased toward the glove foot slightly in front of the throwing foot.
- Stepping into “Ready Position” as the pitcher winds up is common for ALL positions on a softball field.
- I prefer the ‘walking forward” approach. It forces players to stay ready, be in the game and emulates our “right-left-ready” cadence, albeit more upright as shown above.
Drop Step/Rip Open
The Drop Step/Rip Open allows the outfielder to get into a position to move where the ball is hit. We need to beat the ball to the spot, same as the infield and be coming in on it like we do in charging the ball for the infield. This comes down to moving your hips so you can run as fast as possible to beat the ball to the spot so you can come in on it; or as we say in outfield play, “stay behind the ball”.
- Turn your hip and shoulder
- The arms must move. In our drills we say it is almost like elbowing the person behind you
- Do not be a one armed runner. Run, move the elbows, then extend the glove.
- The glove is an extension of your hand
- Keep your eyes on the ball as you run toward the spot it is hit
- Get from Point A to Point B as quickly as possible
Catching The Ball/ Securing The Catch
We are not going to go into advanced training levels here, but simply how to get to the ball and set yourself up to catch it. To reiterate here, nowhere in the above description did we backpedal to the ball. We are athletic, beating the ball to the spot (so we can come in on it if possible) and always ready to sprint. That flows right in to how to secure a catch and get ready to throw the ball in.
- Catch the ball above your head whenever possible. Do not let the ball pass your eyes unless you are coming in and catching the ball in front of you at or near full speed.
- Keep your throwing hand behind your glove so you can “Catch and Cover”. For throwing, you will have your hand close to your glove so you can transfer faster into a throwing motion
- Catch the ball with your body slightly turned to preset your throwing position. This is consistent with how we worked the infield drills two weeks ago.
- Catch the ball with the glove on your throwing side, with the glove facing forward. I have used the term “like you are giving the sky a high five”. If you let the ball pass your eyes, it becomes harder to see and likely it will hit the heel of your glove and pop out.
- Notice how she is coming in on the ball whenever possible.
- At 7:08, Coach Candrea talks about “getting behind the ball”. This simply means to get behind where you think the ball is coming down, so you can charge and catch the ball with your momentum moving forward. To repeat… Get behind where you think the ball is coming down, so you can charge and catch the ball with your momentum moving forward.
- While waiting for the ball to come down, you can keep your feet moving so that you can move into the ball when you catch it, hence creating momentum.
- Coach talks about sun glare…use your glove to block the sun. As an outfielder, you should already be aware from warm ups and between innings of how the sun may impact your vision/ path to the ball.
- Can change your angle a bit to assist yourself…player judgment
- Crowhop. Uses your body strength to throw further and faster. This requires you to jump off using your glove leg and springing your throwing progression towards your target. Using your legs and core (and a long arm) allow for outfield arm strength. This is a totally different throw then in the infield
Angles
- The further the ball is hit, the deeper the angle
- The shorter the ball is hit, the shorter the angle
- Balls hit right at you…if unsure, first step should be back.
- Your eyes are the horizon line…above your eyes are back, below your eyes are in.
- When line drives are hit at you and over you, especially when hit hard, you may have to zig zag a bit and change direction. Keep your eyes on the ball!
- When getting near a fence, depending on your angle, use your throwing hand or glove hand to find the fence. Your outfield teammates should be letting you know how much room you have
- When nearing a fence…find the fence first then come back in. This is also helpful for infielders going after popups near the dugout/infield fences. Find the fence and come back
- Coaches, watch Coach Candrea actually practice fence work. If you do not practice this, you cannot expect your players to make these plays in games.
- When the ball is off the fence, watch how she gets her throwing foot next to the ball to be in a throwing position as she picks it up. EVERY Viper team has worked this drill with me…and should be worked in almost every practice we do. Infield or outfield. Throwing foot on the side of the ball so you come up in a throwing position. Right foot right side…left foot left side.
- WHENEVER POSSIBLE, BEAT THE BALL TO THE SPOT AND GET BEHIND THE BALL SO YOU ARE COMING IN ON IT AS YOU CATCH THE BALL.
Coach Candrea reviews what we covered above.
I hope this assist all of you with some helpful hints on how you can work outfield play in your backyards or open areas. Coach Candrea is the best in the business. We teach exactly what is taught here, not because Coach Candrea does, BECAUSE IT IS RIGHT! We urge you to take the time and run these as much and as often as you can.
Yours in softball,
Bob Germano, NJ Vipers
201-697-9834
#weareeverywhere
Follow Us on LinkedIn
Follow us on Facebook
@realnjvipers Twitter
NorthJerseyVipersSoftball on Instagram
Drills of the week
Wall Drill. Allows you to focus on your rotation and hip turn. Hints…
- back foot slightly turned in
- pull your hands in
- drive your back knee/hip towards the pitcher
- Head Down
- Use an old bat!
Bucket Drill. I like the way they break this down…
- Left foot should end up even with ball at time of contact
- Love the getting up on the back foot to simulate THE LOAD
- Bend at the knees mostly, not as much at the waist
- Keep that back foot slightly turned in to allow you to explode through the ball
Bucket Drill, Soft Toss. See above…adding the following
- Toss a bit from a front. 45 degree angle
- Watch the weight shift…keep the hands, weight and head back
- Stay behind the ball
- Start with telling locations…then progress up. Start all down middle, then inside, then outside, up, down, etc…
Soft Toss, Middle/Inside/Outside. I would love to coach with Coach Candrea…he is AWESOME. He shows soft toss here the same way we do.
- 45 degree angle. Coach goes to front hip…we go between front hip and belly button. His players are elite and all in the top .5%. We are way earlier on the curve
- Look how he shows middle, inside and outside approach. Those who have worked with me know how I obsess on this. If you work soft toss at home, you should be doing this every time.
- As coach says, it is about quality swings, not quantity. Do not rapid fire. Let the hitter get set
- Top/bottom ball. Forces hitter to stay back and keep head straight. Up to you if you wish to do this one…I usually do not. There is value to it, your call.
Groundball Work, Bill Ripken

I am a big fan if how Billy Ripken ‘’BR’’ teaches and presents. A classic example of a big league player who had to grind and claw his way to the majors and had to outwork anyone and everyone to stay there.
Would have made a great manager in my opinion
There are subtle differences in what he is teaching here vs. what we teach here in Viperville. The variations are directly correlated to field size and the speed of our game vs a 60/90 baseball diamond
Field, Step, Turn, Throw, Follow
Watch as BR he is:
- In a low fielding position. We refer to this as on the bucket and hands in the triangle
- Where BR has his feet even and fields the ball in the middle, I would like to see our kids mimic a step to charging the ball and picking up inside their glove foot instep
- BR says to shuffle, not to crossover. 100% accurate. The term we use is click your heels
- Watch as he turns his shoulder towards his target
- Make the L, snap your wrist, follow your throw.
- The fielding of the ball, getting to a throwing position and throwing the ball are all in an athletic position. Keep the knees bent, not straight
Fielding, turning, throwing
Again, more for a baseball drill as demonstrated. I will modify to softball. The way this drill is shown is good for our third basemen on a hard/hot shot. I would ask our players to:
- Right-Left Ready
- On the bucket
- Field inside your glove instep…doing a preset of your feet prior to throwing the ball
- Come through the ball
- Click your heels
- Turn your shoulder, Make The L, Follow your throw
- Hit your target
Wall/Screen Drill.
- Great drill…can do this outside against a wall or in your basement. Can use a tennis ball, softball, baseball…does not matter
- I like the two hand approach…use the aligator chop with the right hand, so that the ball is not rolling out of your glove
- Try to get it at your belly button…remember, when we move left or right, it is always to beat the ball to the sot and charge so you get it at your belly button
- BR says to catch it out in front…that is the equivalent of the triangle we always cite as the ideal place to field the ball. This allows us to come in like an airplane and not straight down like a helicopter.
- He mentions to field and receive, as he brings the ball up to his waist. We should be doing that as we move forward towards our throwing target
Backhand
BR shows it as a field off your right foot for righties, left foot for lefties. This is correct if it is hit very hard and that is your only lay. You can also do it with a crossover as if you were moving for the ball. Either way, we like a Drop, Drag and Turn of your glove to get there. Backhands are only necessary if you cannot get your body in front, or it is a slow roller and we are raking through. I suggest doing this from only a few feet away, so you can ensure the ball is accurately rolled/ placed at the proper spot. Hitting from a distance is hard to emulate the actual speed.
- If you remember nothing else, remember to field the ball out in front
- Since these actions are simulating hard hit balls, you have a lot of time to set your feet and make your throw
- Combine the muscle memory from the first two drills above.
- In all likelihood, the hitter/runner is not even out of the box yet if you had to backhand as shown.
- Make a good throw after a great play!
Getting The Lead Runner
BR shows how you would throw to 2b to get the lead runner from the left side of the diamond
- Field at the belly button
- Stay low
- Field out in front
- Turn your shoulder
- Click your heels
- Snap/follow your throw to your target
These are all GREAT ways to work on your fielding. Can do on your own against a wall, or with a family member/s guiding where the balls are hit and also having someone to throw to
We simulate most to all of these drills in our practices…all but the kneel down wall drill that I will likely incorporate when we re-open.
Infield Crossfire

I have attended many practices at all of our levels and I think this video is a good way to relay what we teach on approaching ground balls from across the diamond.
I do not see any of the campers here doing what she suggests, but listen to JF. She is teaching this the right way and must have taped one of our practices to fill the agenda. Combined with what we teach-
- Right-Left ready [on the bucket]
- Hands in the triangle [not on the ground, but out in front]
- Stay low as you approach the ball…come in like an airplane
- Keep your palm up as you come in on the ball
- COME THROUGH THE BALL
- Cut the angle and field the ball inside your glove foot instep. This pre-sets your footwork
- Stay athletic, TURN YOUR SHOULDER toward your target as you set to throw
- Click those heals, stay low in an athletic position
- Make the L, snap your wrist and let your momentum carry your toward your target
- Throw the ball hard…your shoulder will set the direction of your throw
Also…always remember
Beat the ball to the spot
Always Charge the ball whenever possible